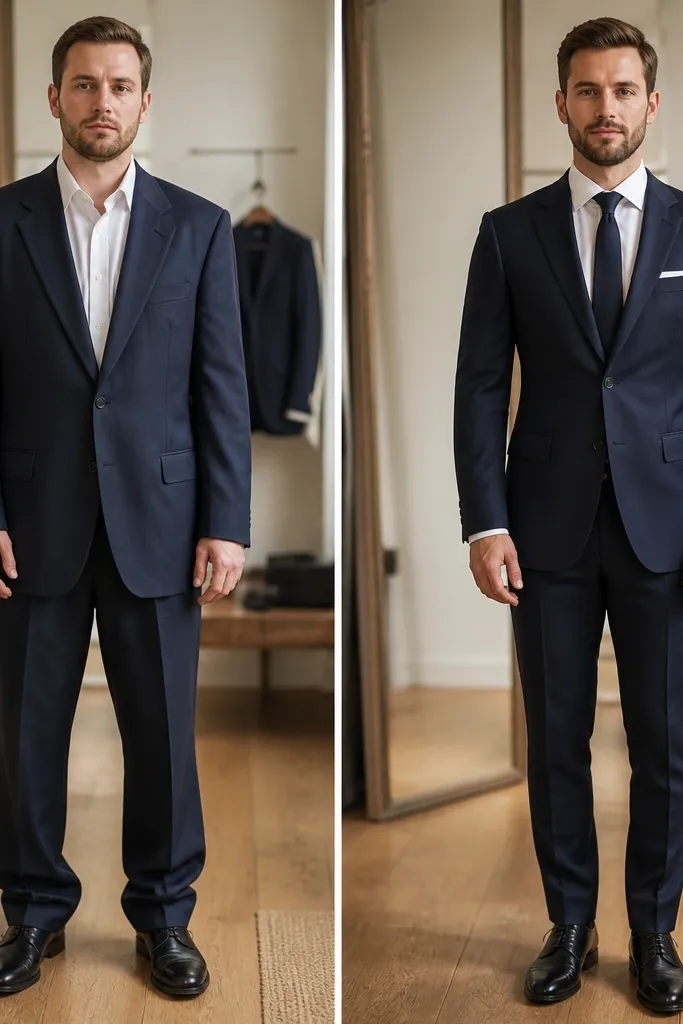
1. Shoulder Reset: From Boxy to Built-In
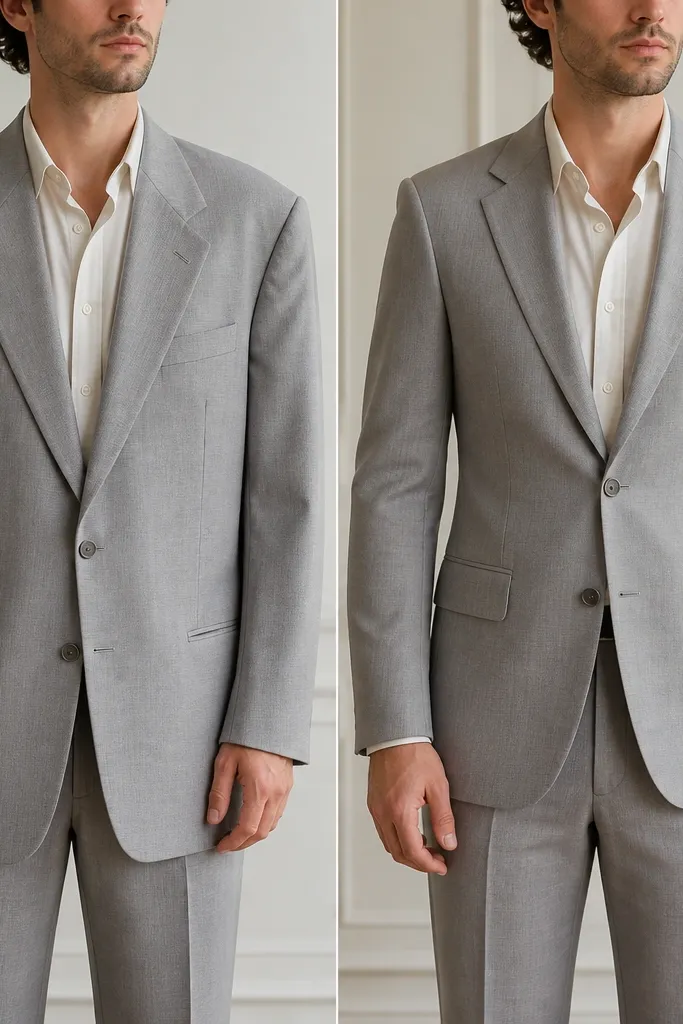
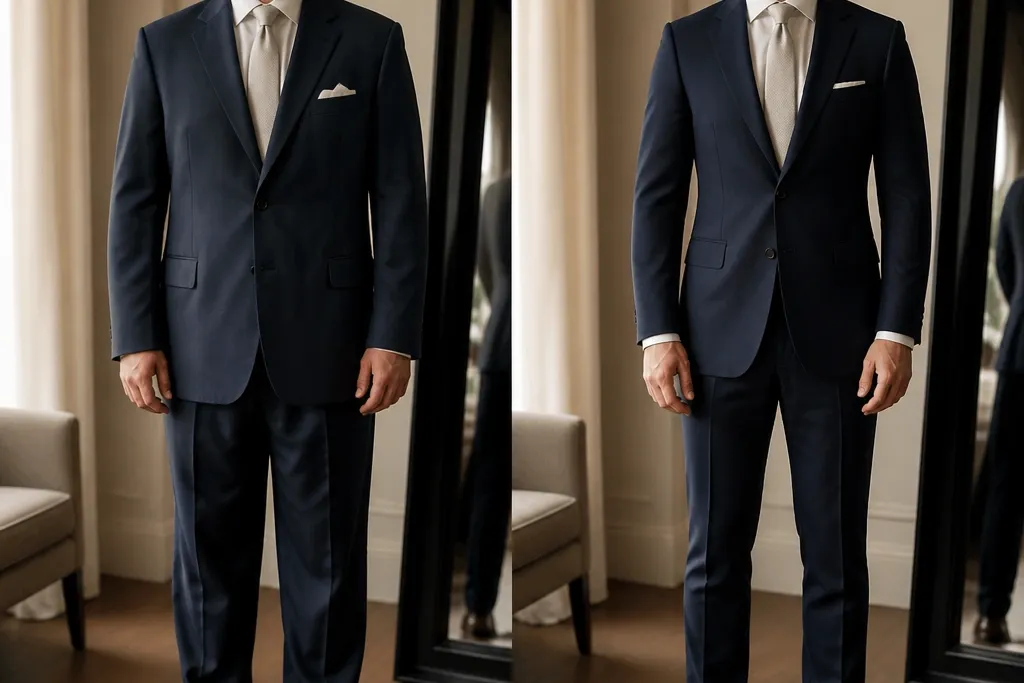
The before jacket rides slightly off the shoulder, so the lapel edge looks wavy and the torso feels bigger than it is. The after fit uses shoulder tailoring so the seam sits where your shoulder naturally ends. This makes the jacket look “custom” even when the suit is off-rack.
Good to knowIf the shoulder seam is more than 1 cm past your natural shoulder, plan a tailor adjustment before the wedding day.
2. Jacket Length Swap: Hip Coverage That Looks Intentional
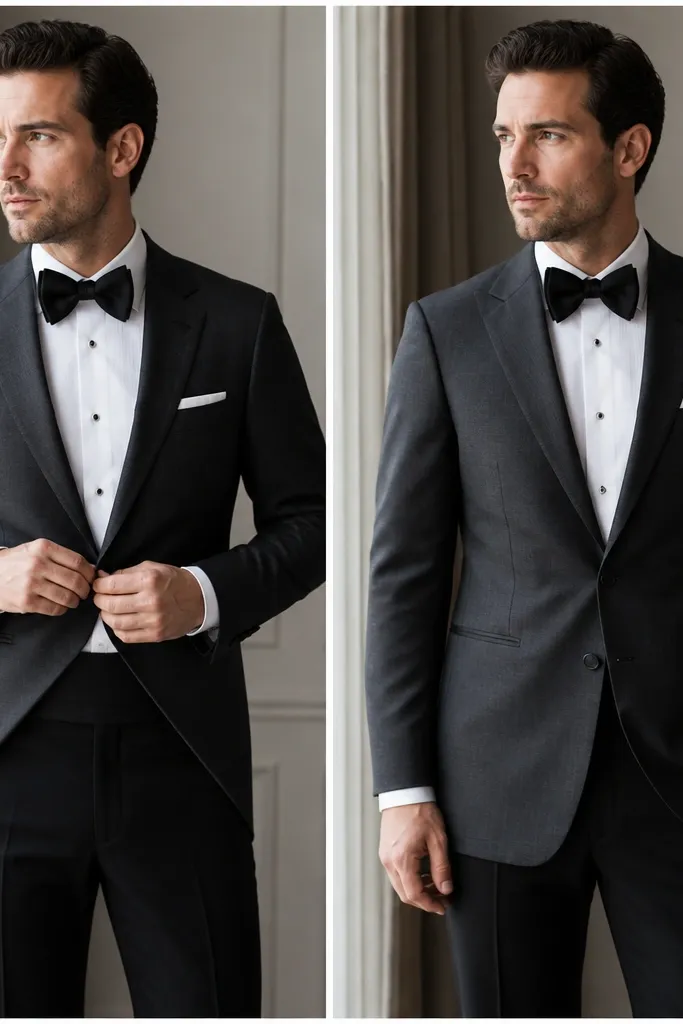
When the jacket ends too high, it shortens your visual leg line and makes the waist look heavier. The after jacket hits closer to mid-hip, so the front panels fall straighter and your proportions look balanced. Even a small length change can improve how the suit photographs while you’re standing and walking.
Good to knowAim for jacket hem length that covers your seat when standing — check in a mirror from the side, not just the front.
3. Sleeve Pitch Fix: Watch-Frame Without Excess Cuff
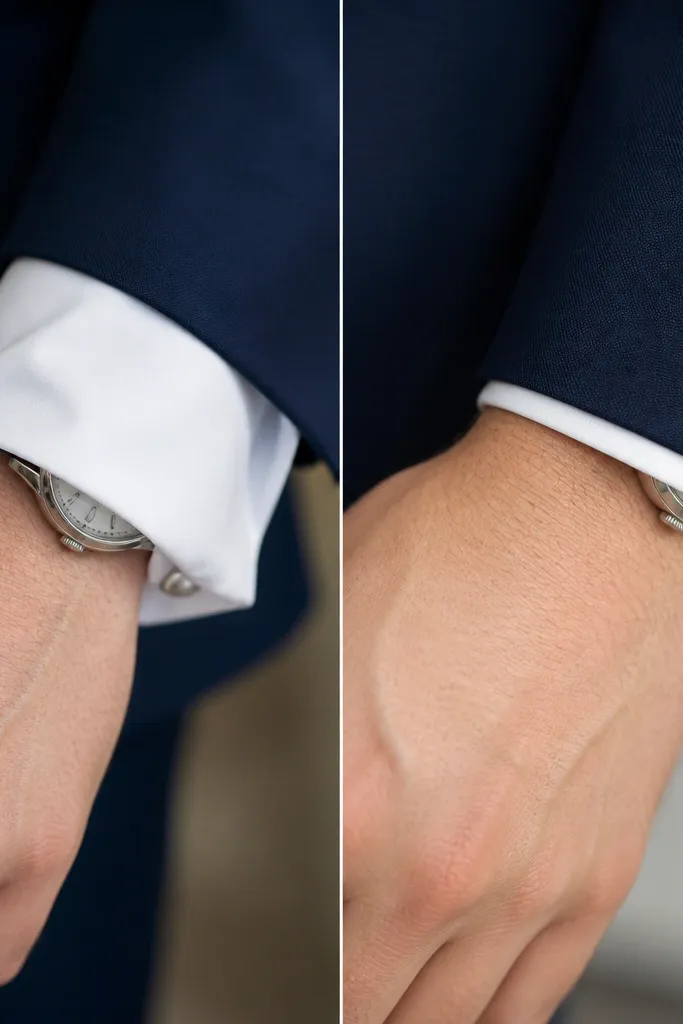
In the before, the sleeves sit a bit long and the shirt cuff bunches, so the wrist looks thicker and less elegant. The after fit shortens the sleeve length and aligns it so the shirt cuff shows about 1/4 inch to 1/2 inch. This creates a crisp line that looks expensive in close-up wedding photos.
Good to knowWear the exact shirt you’ll use on the day, then set sleeve length so cuff visibility is consistent when your arm is relaxed.
4. Waist Suppression: Cleaner Front, No Tension Wrinkles
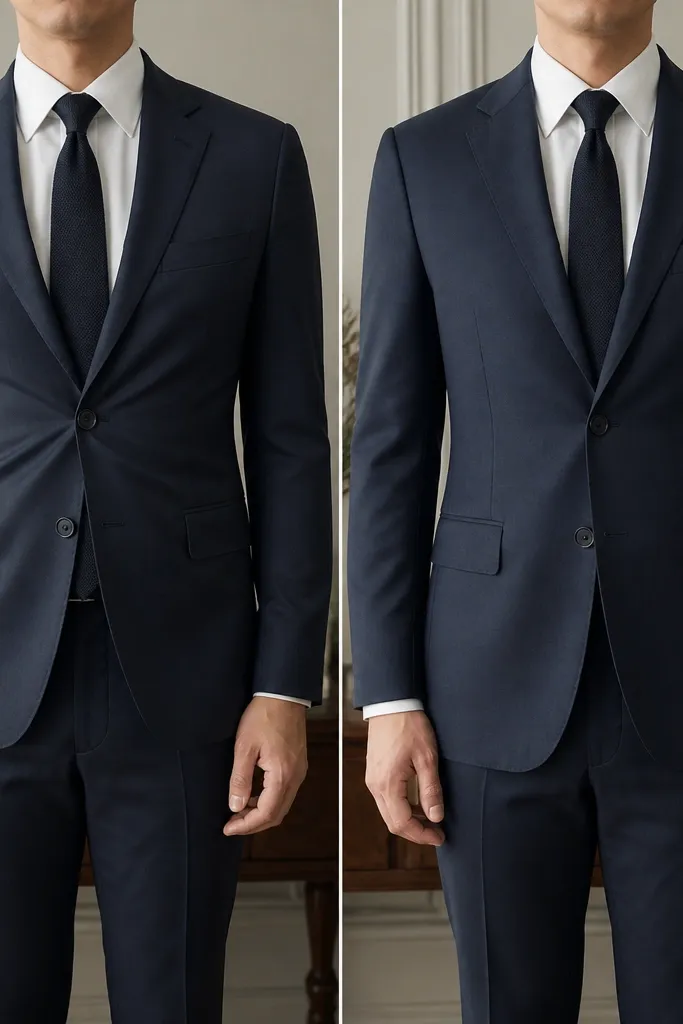
The before jacket pulls at the button area, which creates diagonal wrinkles and makes the suit look tight even if it’s “technically” your size. The after tailoring reduces the waist looseness so the jacket hugs your torso without fabric strain. The result is a flatter front and a more confident stance.
Good to knowDo the “button test” — button the jacket and raise your arms slightly; if wrinkles form instantly, plan waist and/or chest adjustments.
5. Trouser Break Upgrade: One Clean Line From Shoe to Hem
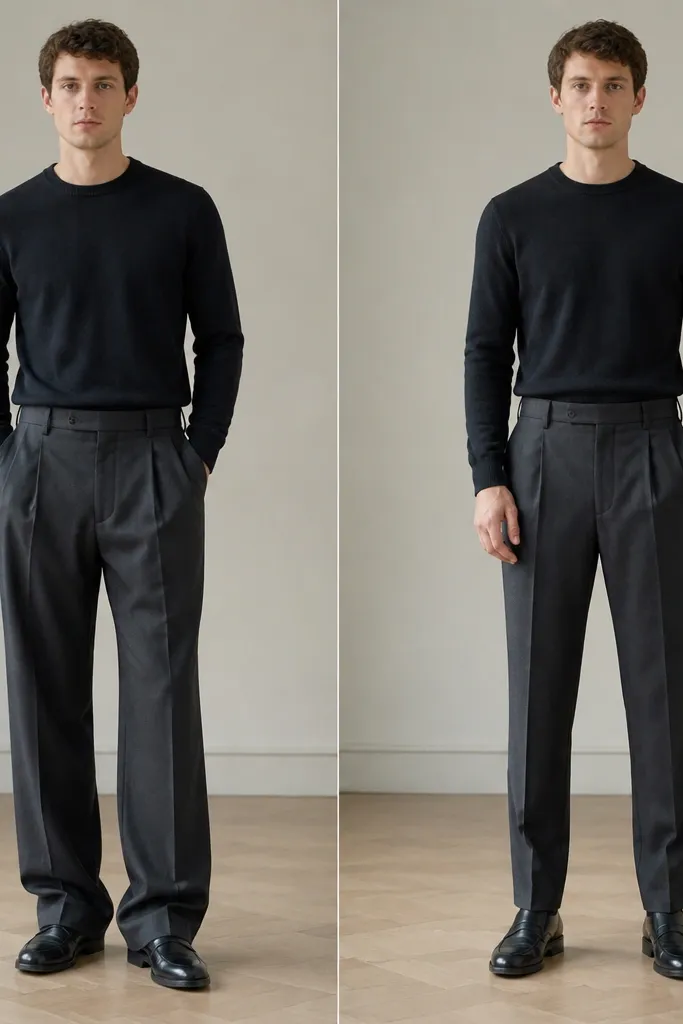
Too much trouser length causes pooling and makes the outfit look heavy, especially in photos with bright flash. The after hem is tailored to create a controlled break that keeps the line smooth from knee to shoe. This is one of the most noticeable groom suit transformation before after changes on camera.
Good to knowTry shoes on and check hem height while standing — you want a slight break, not a stack.
6. Shirt Collar Height: Lapels Sit Flat, Photos Look Polished
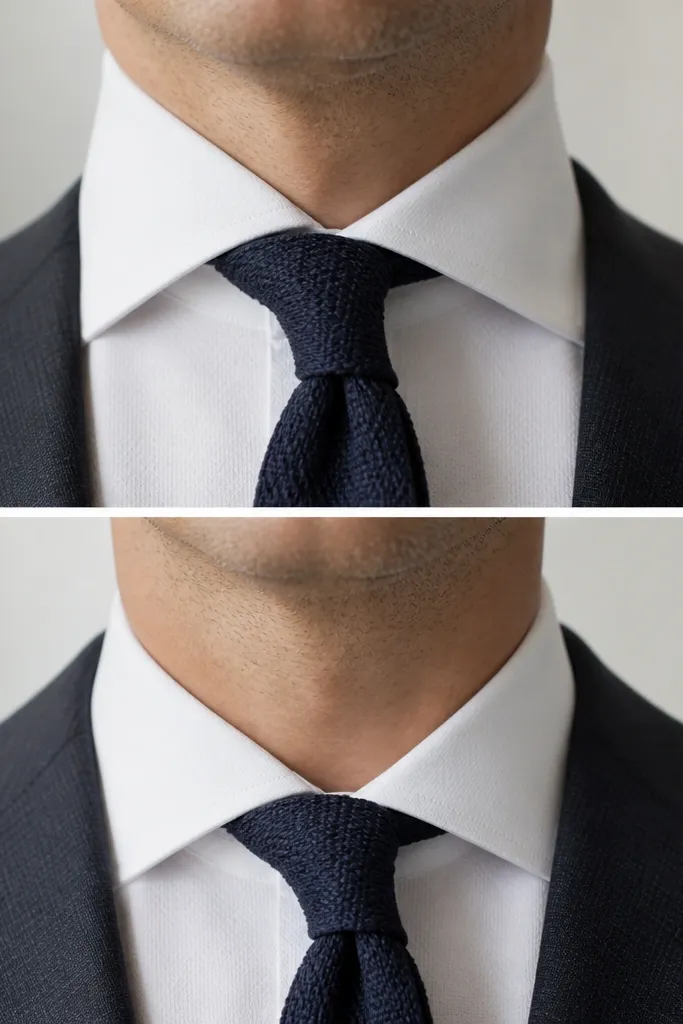
In the before, the collar sits high and pushes the lapels outward, creating a gap that looks sloppy in wedding portraits. The after uses a collar that sits flatter so the tie knot and lapels align naturally. This makes your face look more centered and the overall look more intentional.
Good to knowChoose a shirt with a collar height that allows the tie knot to sit snug without forcing the collar points up.
7. Lapel + Tie Proportion: Balanced V for the Camera
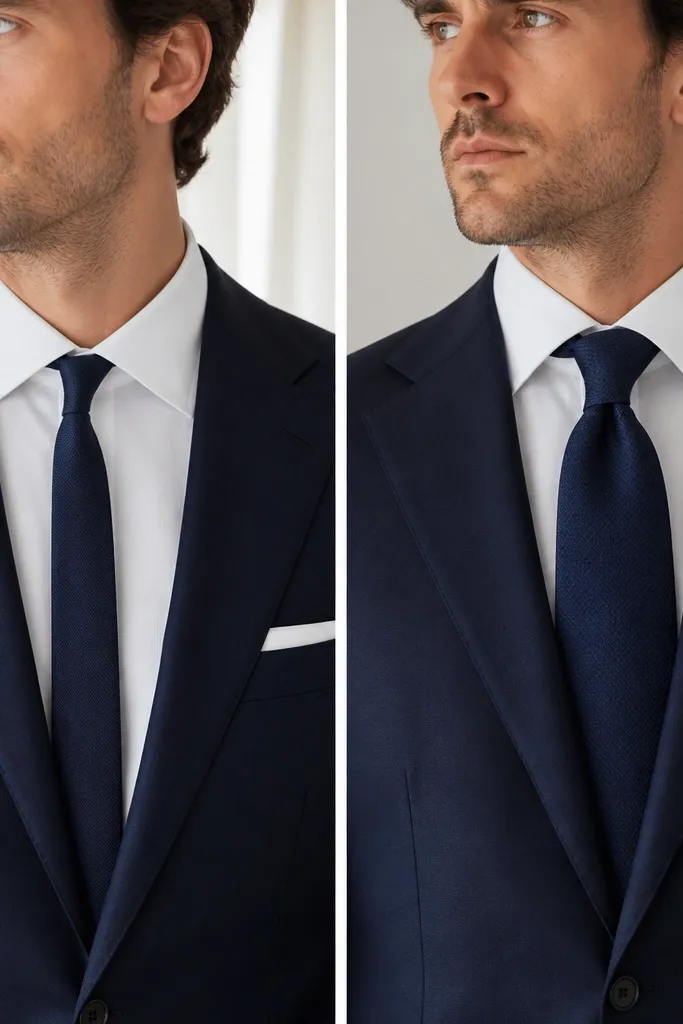
A tie that’s too narrow against wider lapels makes the V-shape break uneven, and it reads “off” in photos. The after uses a tie width that matches the lapel scale so the knot sits centered and the lines pull upward. This creates a flattering face-framing effect.
Good to knowMatch tie width to lapel width — if your lapel is medium-wide, go medium to wider tie width for a clean V.
8. Pocket Square Placement: Subtle Pop, No Bulk
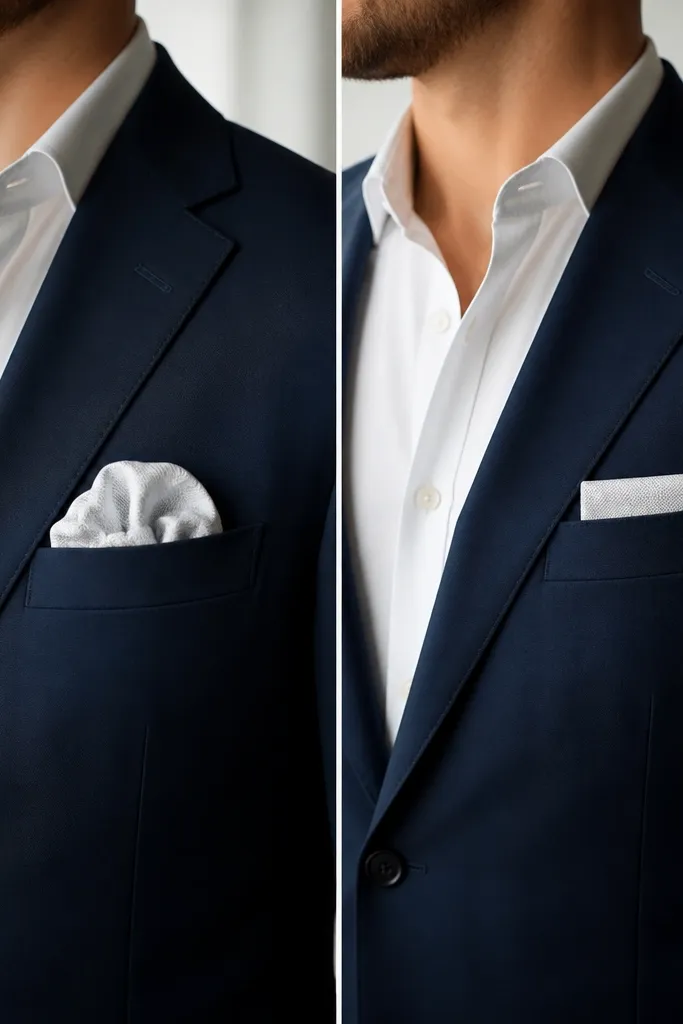
The before pocket square looks heavy because it’s too large and sits too low, competing with the tie. The after fold is thinner and placed slightly higher so it adds a controlled flash of color without stealing attention. It’s a small change, but it makes the jacket look styled rather than just worn.
Fold for a flat triangle or straight edge, then place it so the peak sits about 1-2 cm below the lapel line.
9. Shoe + Belt Match: The “Finish” That Locks the Look
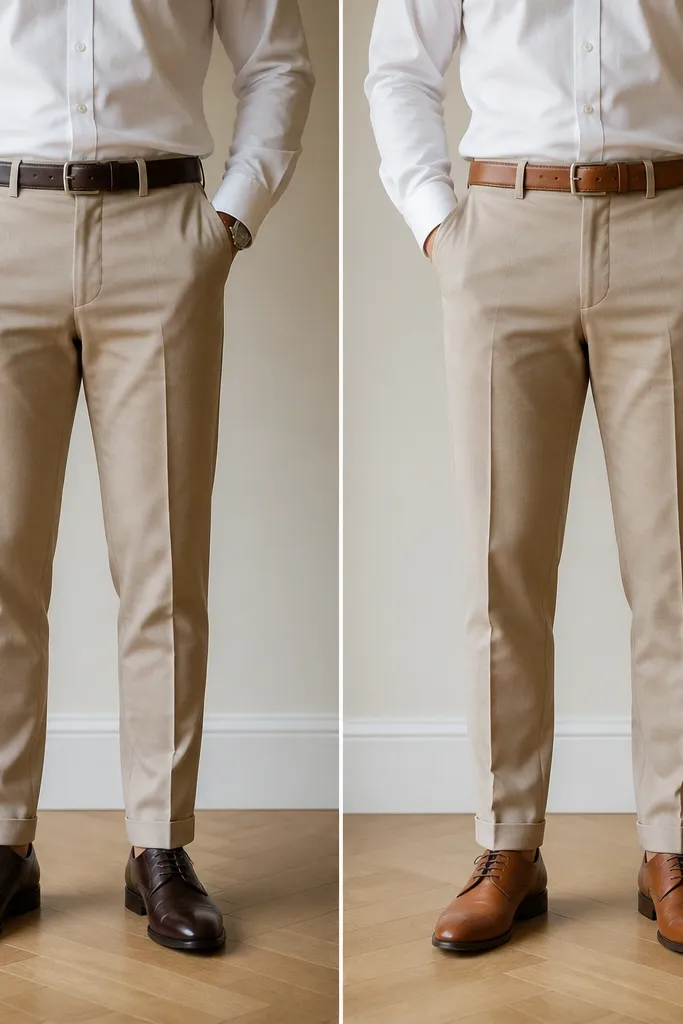
When belt and shoes don’t match, the outfit looks visually fragmented, especially with flash photography. The after uses a belt in the same leather tone as the shoes, so the eye travels smoothly from trouser to footwear. This gives the whole outfit a grounded, finished look.
Match belt color to shoe color — not to the suit. If you’re between shades, go with the shoe tone.
10. Fabric Choice for Seasonal Comfort: Breathable Look, Not Sloppy
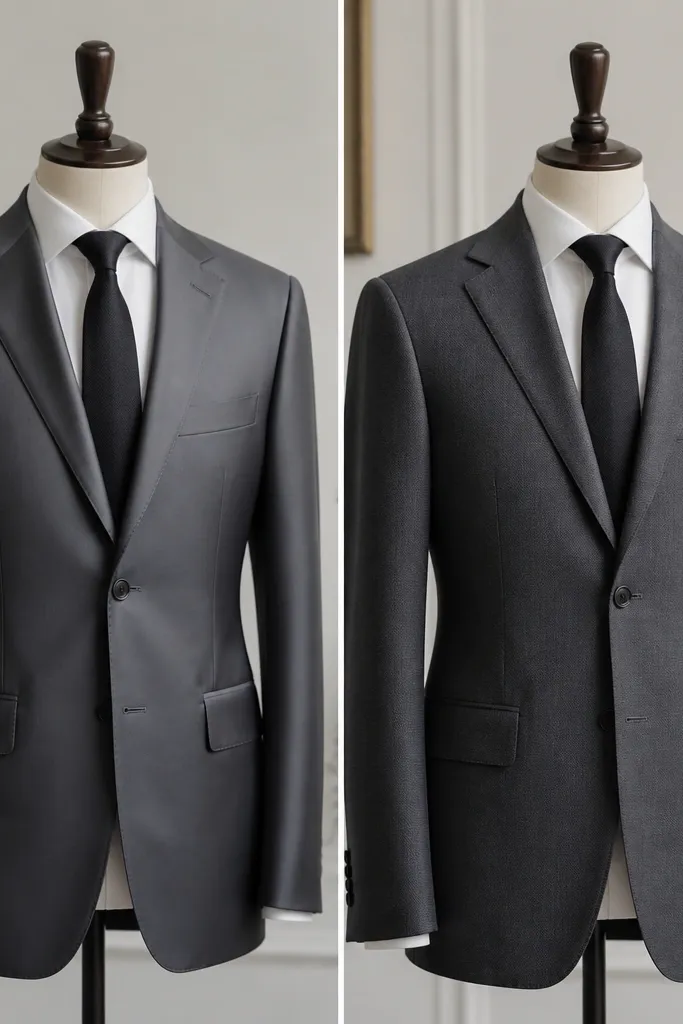
A stiff or overly shiny fabric can look “cheap” under indoor lighting and can crease faster when you sit. The after suit uses a more matte, finely textured cloth that holds shape and photographs cleanly. This matters for spring and summer weddings when you’re moving, sweating a little, and still want crisp lines.
Good to knowFor warm months, prioritize matte weaves and avoid high shine — look for subtle texture, not gloss.