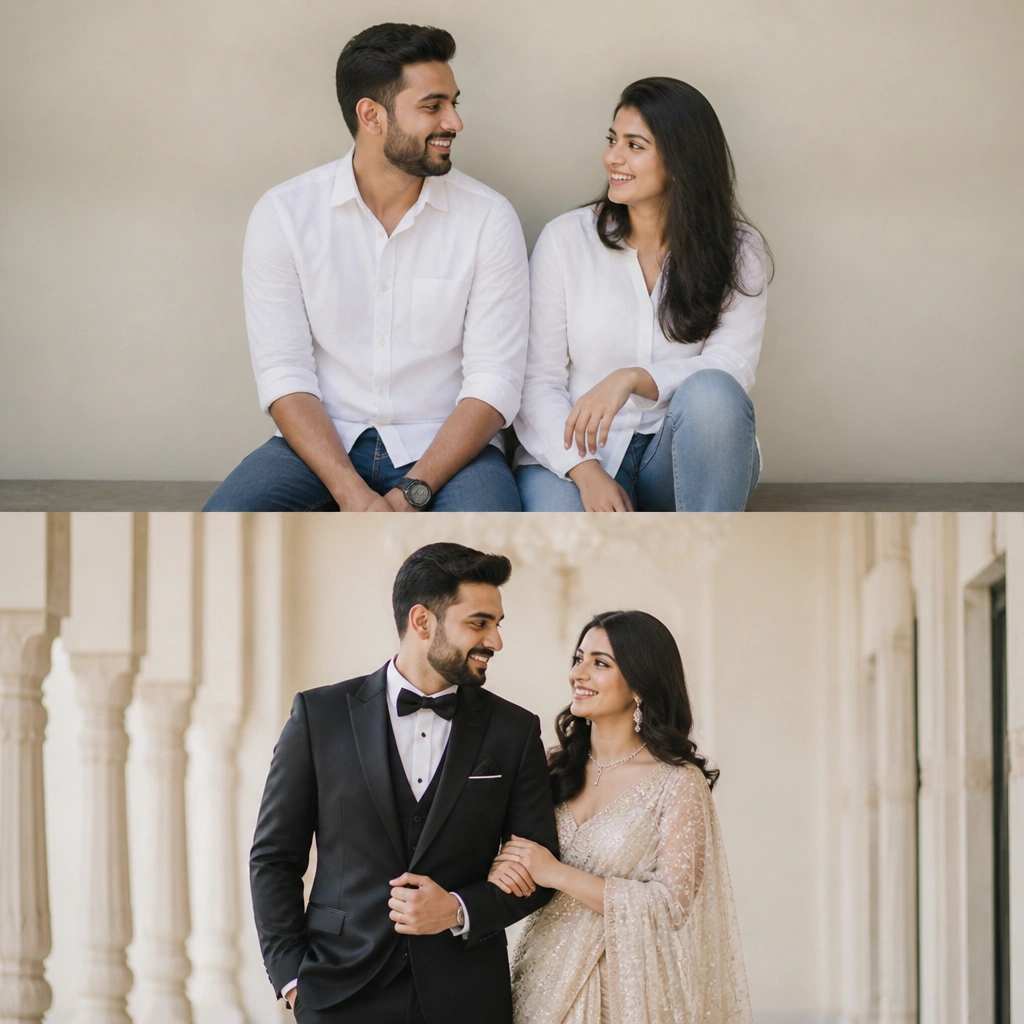
1. Charcoal Suit + Cream Shirt (City Steps Upgrade)
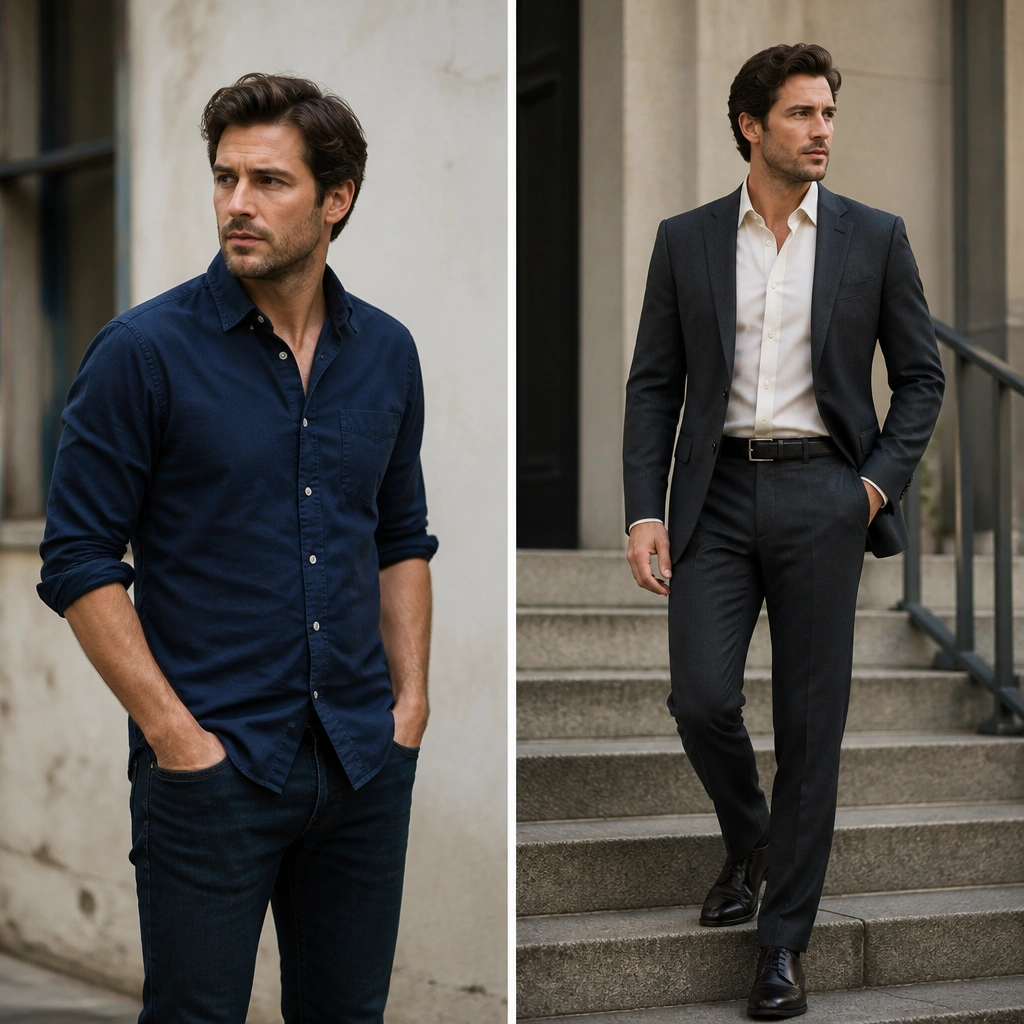
The before outfit reads casual because the fabric is thin and the shirt creases too quickly. The after is a camera-friendly shift to heavier wool-blend texture plus a high-contrast cream shirt that brightens the face area. The key is keeping the shirt collar crisp and ensuring the jacket sits clean at the shoulder — that’s what creates the “transformation” effect.
Good to knowIf you’re renting, ask for a suit with shoulder padding that looks structured (not soft). For DIY, steam the shirt and do a quick collar press before leaving.
2. Sage Linen Set + White Tee (Garden Wind Friendly)
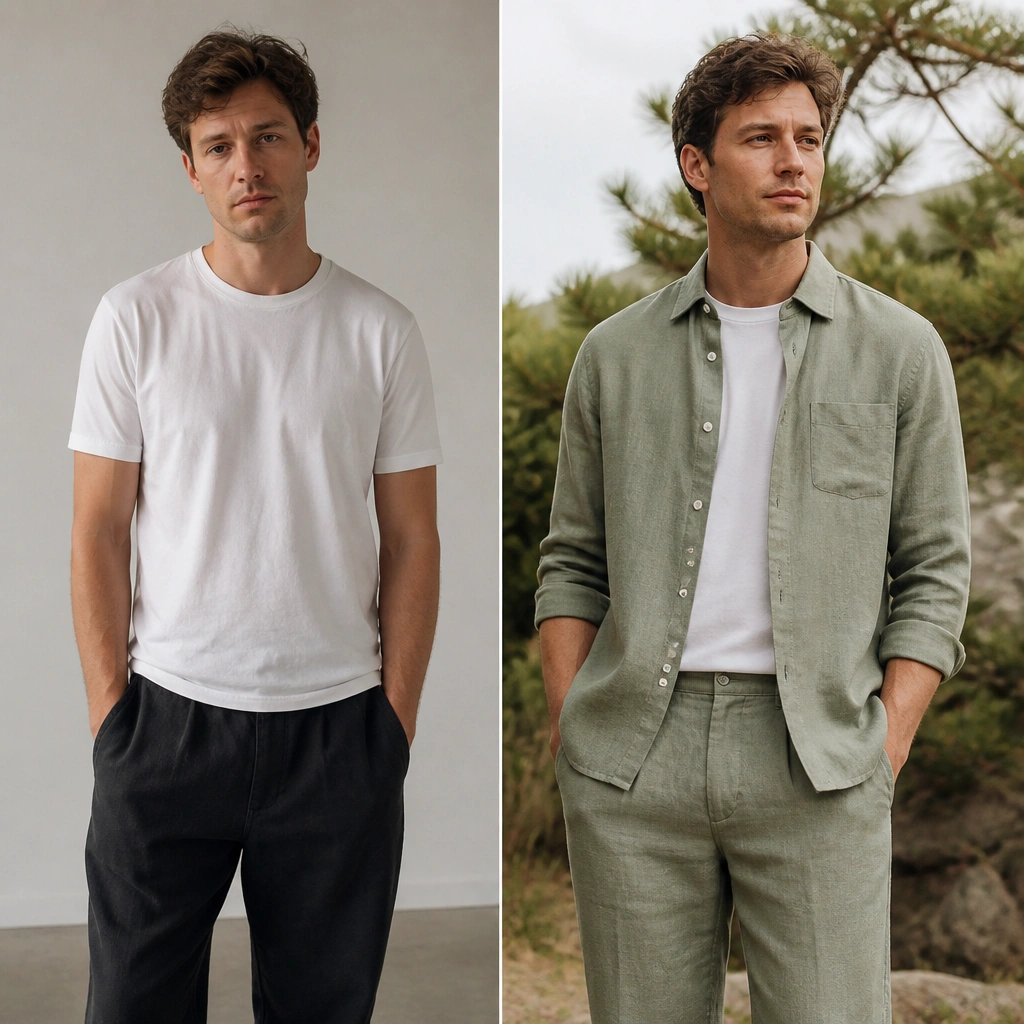
Linen adds texture that shows up clearly in daylight and resists the “flat” look that plain cotton gets in bright sun. Sage also photographs softer than olive, which makes skin tones look smoother in photos. Keeping the top slightly open adds relaxed romance without losing structure.
Good to knowChoose linen in a mid-tone (sage/soft olive) and wear a white tee with a thicker knit so it doesn’t cling or wrinkle.
3. Black Kurta + Gold Buttons (Evening Glow Fix)
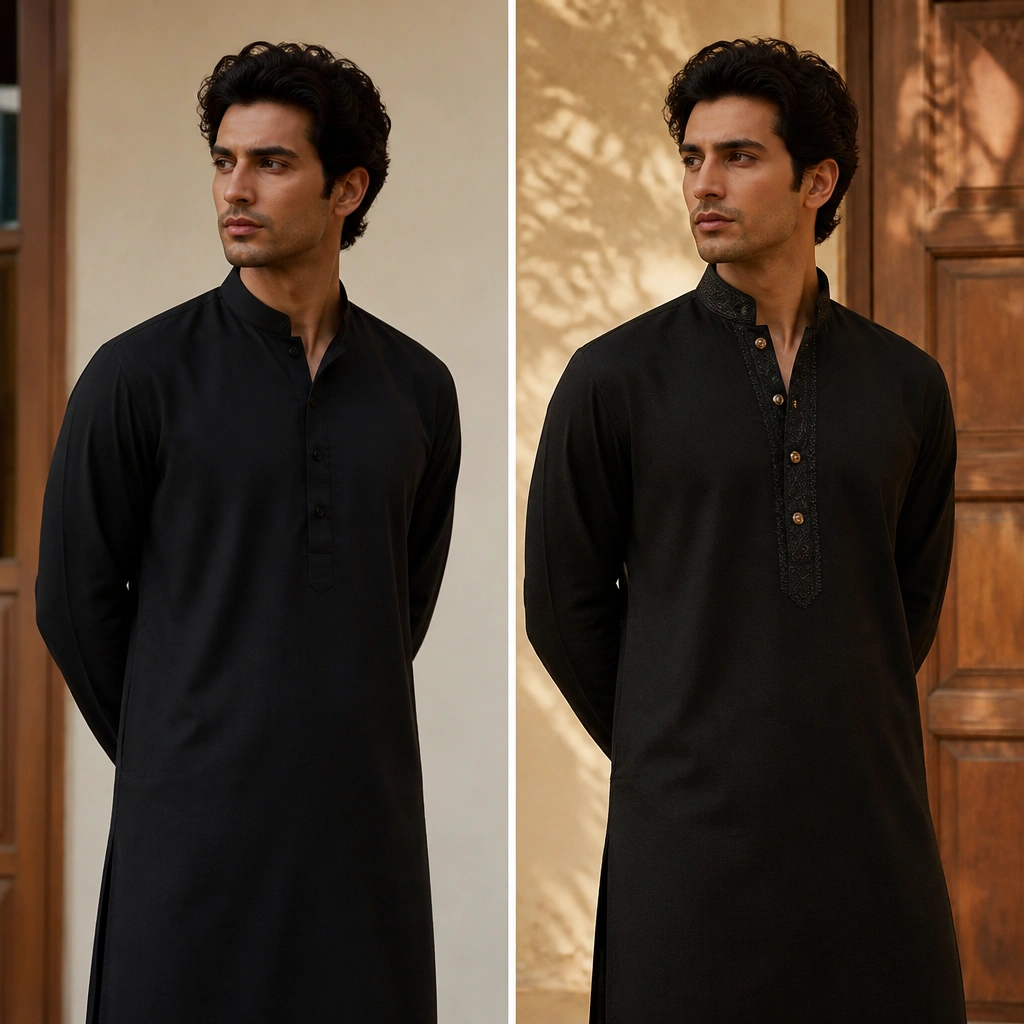
The before looks one-note because the fabric and detailing don’t catch warm evening light. The after adds micro-contrast via gold buttons and light embroidery — it creates highlights that look “jewelry-like” without needing heavy accessories. A slightly lifted collar frames the face and helps you look intentional in every angle.
If you can’t change the whole outfit, add a gold-toned accessory detail — like a matching button-up placket pin or a watch with a warm metal tone.
4. Cream Co-Ord Suit + Tan Loafers (Beach Without Looking Lost)
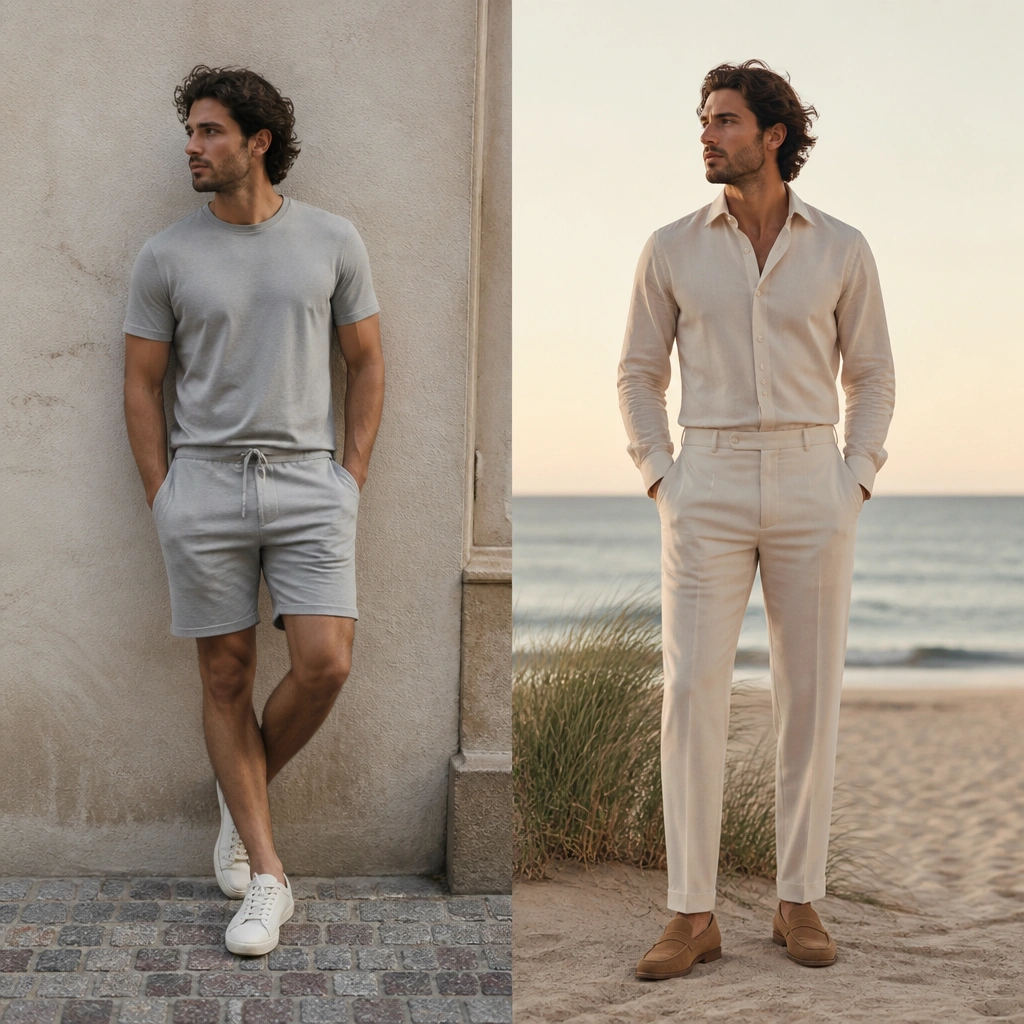
On beaches, light outfits can blend into sand. The after works because the cream fabric is tailored and has a slightly warmer undertone, plus tan loafers add grounding. The co-ord silhouette also reduces visual clutter — fewer seams, cleaner lines, more “editorial” photos.
Good to knowPick cream that’s not icy white. Look for a warm ivory/cream tone and pair with tan accessories so the outfit doesn’t disappear in the background.
5. Blush Satin Dress + Pearl Drop Earrings (Romantic Close-Ups)
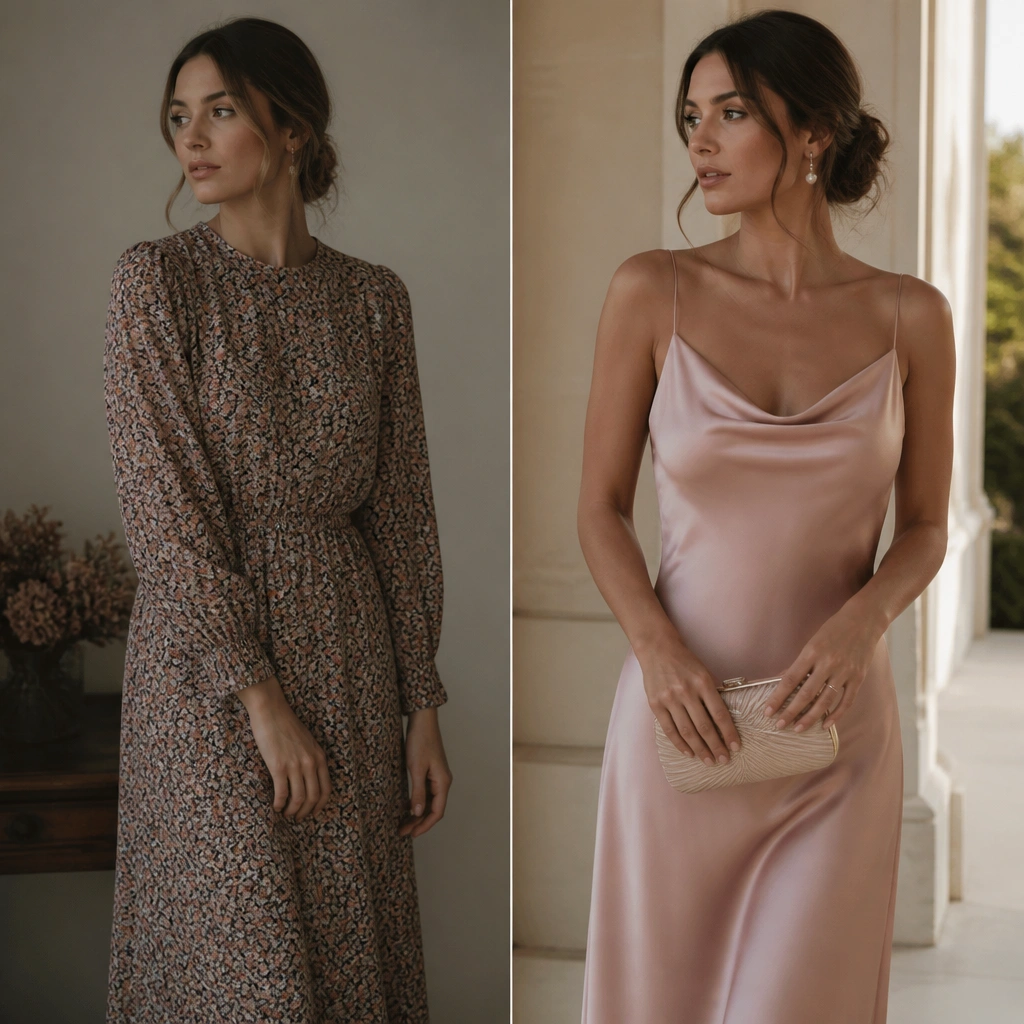
Matte fabrics can look flat in close-ups because they don’t catch directional light. Satin gives gentle shine that reads luxurious in both day and golden-hour lighting. Pearl drops echo the soft blush tone and frame the face without stealing attention from the couple.
Good to knowUse a satin-safe steamer and avoid heavy perfume on the fabric. If you’re worried about shine, choose “soft satin” rather than high-gloss.
6. White Shirt + Waistcoat + Dark Trousers (Smart Casual That Looks Expensive)
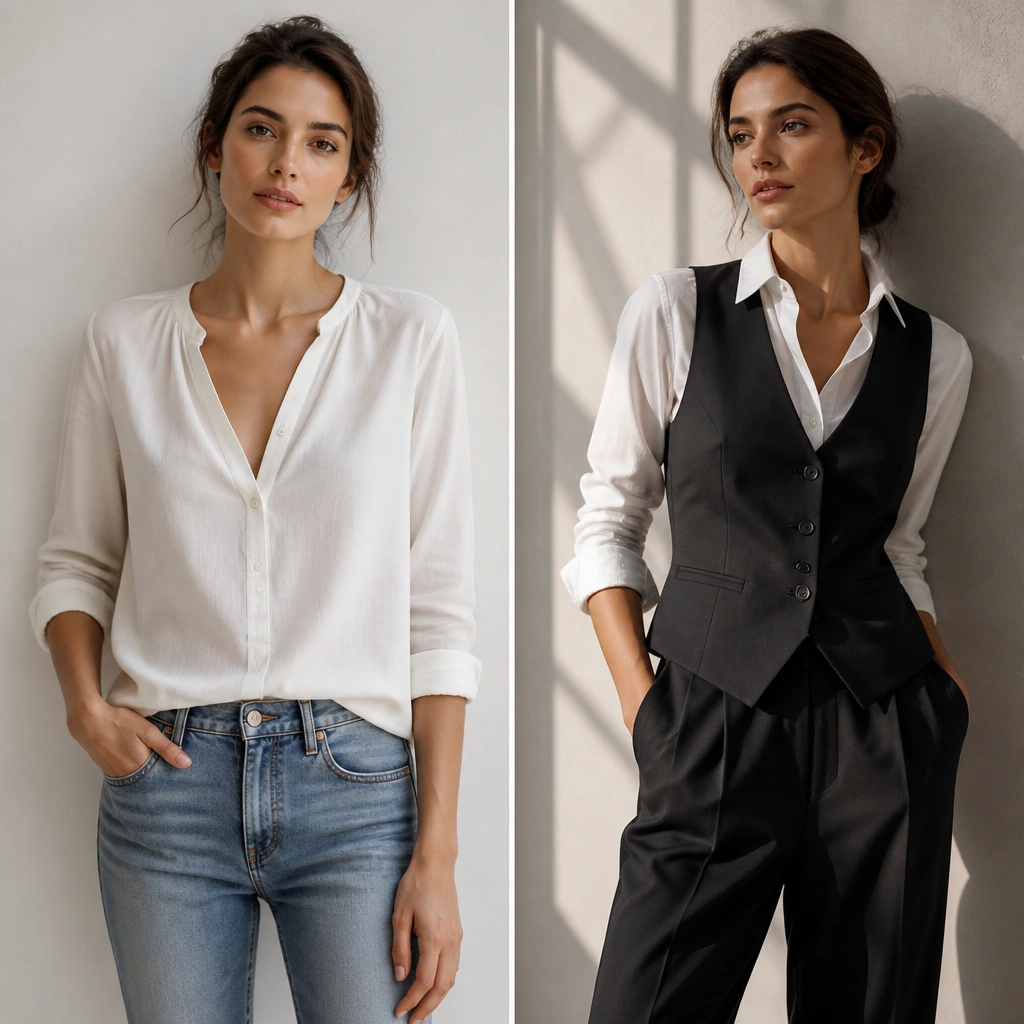
Before feels everyday because there’s no structure at the torso. The after transformation comes from adding a waistcoat that creates shape and depth in photos. Dark trousers balance the brightness of the shirt and keep the look grounded.
Good to knowChoose a waistcoat with a defined armhole and a slight stretch. Make sure the front buttons align so the symmetry shows on camera.
7. Denim Jacket + Slip Skirt Layer (City Street Cool)
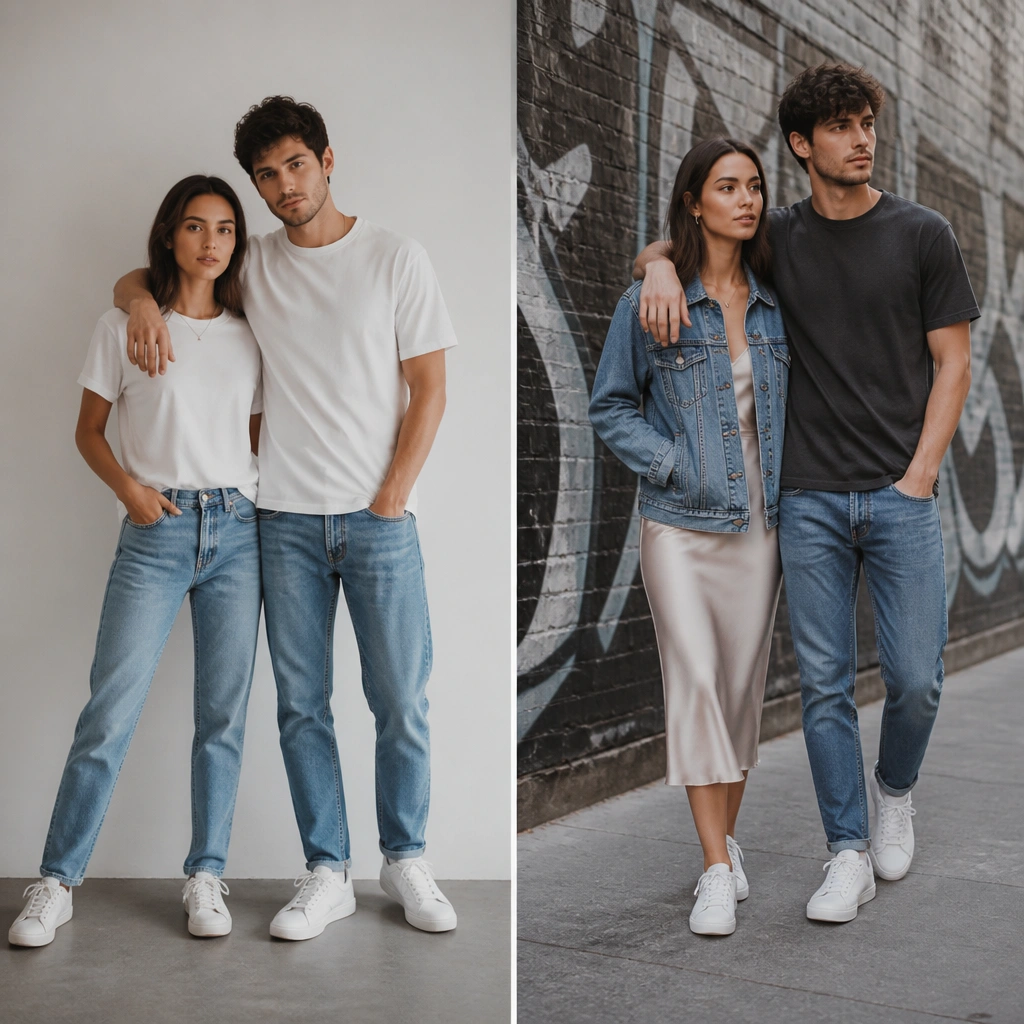
Plain tees look casual, but they don’t give enough texture variety for street photography. The after adds a denim-to-satin contrast that creates movement and highlights the couple’s styling choices. The denim color also plays well with urban backgrounds, especially with warm street lighting.
Good to knowLayer with intention — denim jacket hem should hit at the natural waistline of the skirt for a clean silhouette.
8. Monochrome Cream Hijab + Matching Outerwear (Clean Editorial Lines)
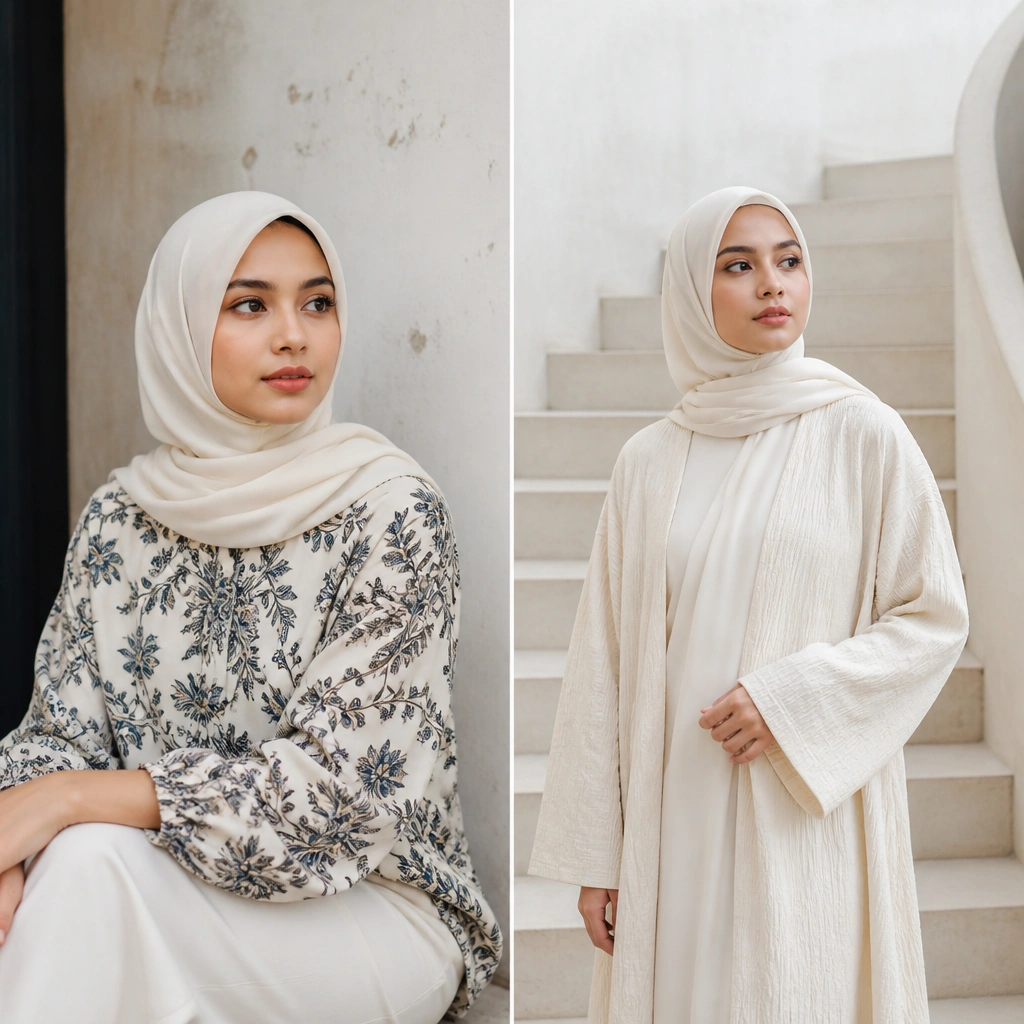
Mixing too many patterns can create visual noise, especially in high-resolution wedding photography. The after uses monochrome cream with different textures — hijab fabric + outerwear texture — so the look stays interesting without patterns. Matching head-to-outerwear tones also makes the face area look brighter and more centered.
Pick two shades max: one for the hijab, one for the outerwear. Keep undertones warm so everything photographs cohesive.
9. Classic White Shirt + Burgundy Tie (Color Pop for Couple Photos)
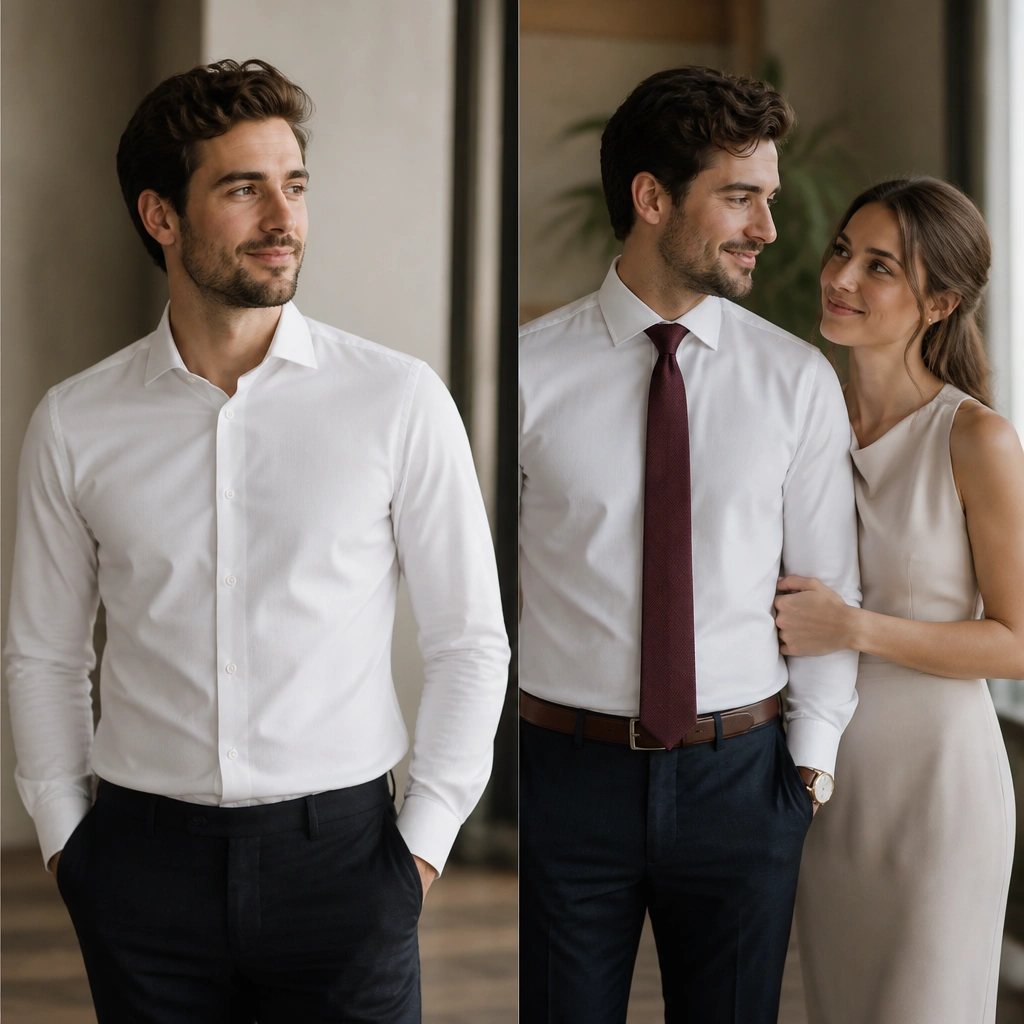
A plain shirt can look too basic next to a more styled partner. The after adds a controlled color pop via a burgundy tie, which creates a focal point and improves portrait composition. Burgundy also harmonizes with many wedding palettes — blush, cream, champagne, and even sage.
Choose a tie with a subtle texture (matte knit or micro-weave). Avoid shiny ties that reflect camera flash harshly.
10. Neutral Knit Dress + Belted Waist (Figure-Defining Upgrade)
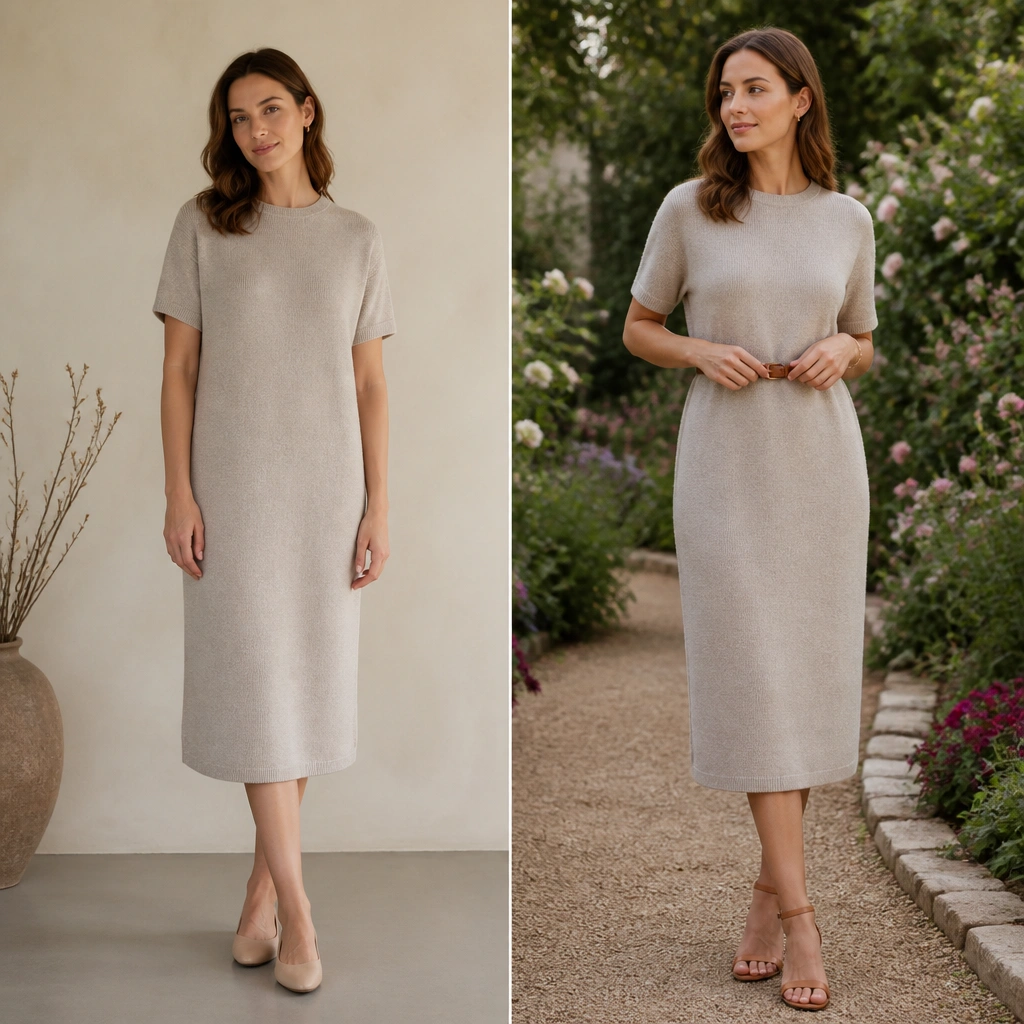
Straight silhouettes can make photos feel shapeless because they don’t define the waistline. Adding a belt creates a clear proportion shift that reads instantly, especially in full-body shots. A thin belt looks elegant and avoids bulky bulkiness in wind.
Good to knowBelt placement matters — wear it where you’d naturally put your hands for a comfortable waist. Use a belt in the same undertone as your shoes.
11. Tan Leather Jacket + Black Trousers (Timeless Night Portraits)
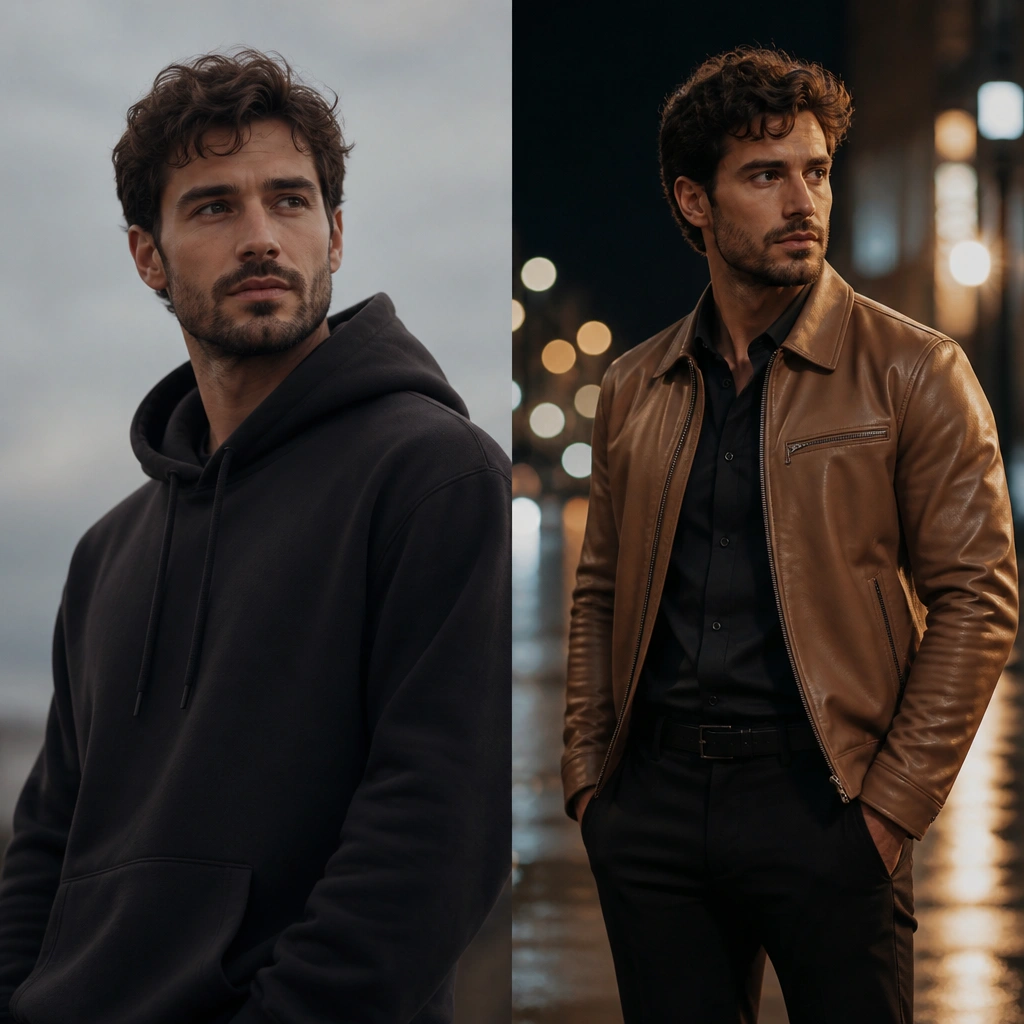
Hoodies hide your shape and can make you look too casual for a pre-wedding shoot. The after transformation comes from leather’s structure and reflective highlights that look great under street lighting. Black trousers keep the look sleek while the tan jacket provides warm contrast.
Good to knowIf your leather is stiff, wear it for 30 minutes before photos so it drapes naturally and doesn’t crease awkwardly.
12. Flowy Chiffon Overskirt + Solid Base (Movement for Outdoor Shoots)
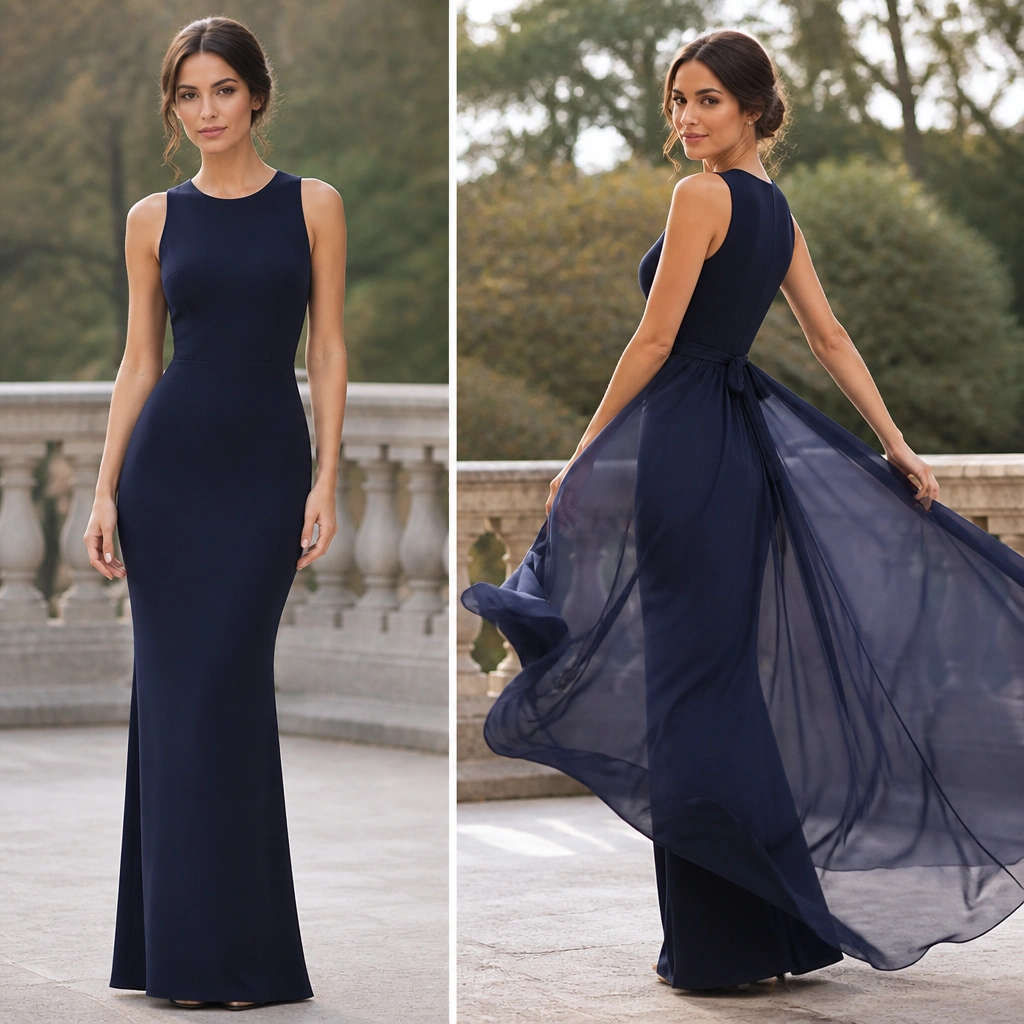
Solid dresses look pretty, but they can look static in movement shots. Adding a chiffon overskirt creates airy layers that catch wind and add motion blur in the most flattering way. Because the base remains solid, the look stays polished rather than messy.
Good to knowPin the overskirt at the waist seam (or use an elastic hidden inside) so it sways but doesn’t shift out of place.